 Kymco XCITING 500 - Service Manual > Brake Fluid
Check
Brake fluid
Brake hose:
Cracks/wear/damage → Replace.
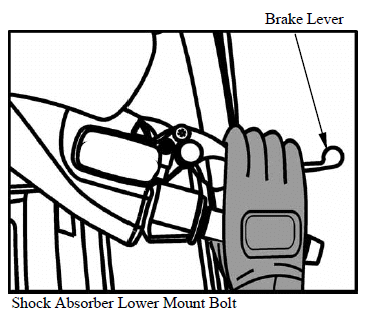
Apply the brake lever several times.
Fluid leakage → Replace.
Brake hose clamp:
Loosen → Tighten
FLUID REPLACEMENT
Front brake
Avoid spilling brake fluid on painted, plastic or rubber parts and so on. Place a rag over these parts whenever the system is serviced.
Place the scooter on a level surface and keep the handlebar straight.
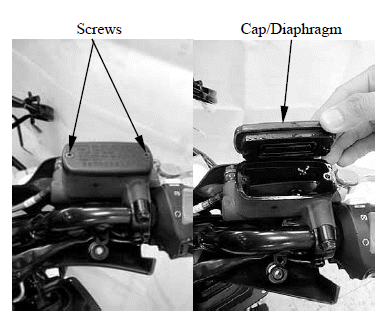
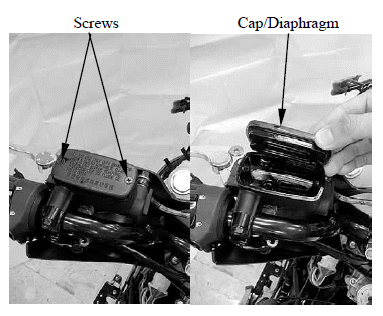
Remove the master cylinder reservoir cap and diaphragm.
Suck up the old brake fluid as much as possible.
Fill the reservoir with new brake fluid.
Specification and classification: DOT 4
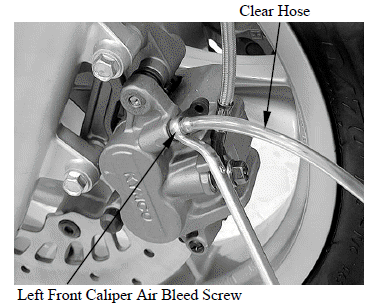
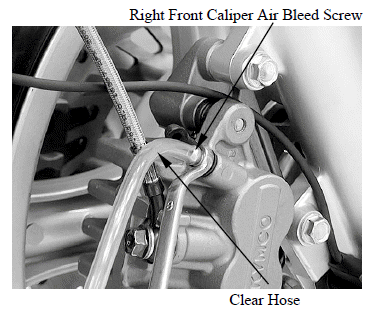
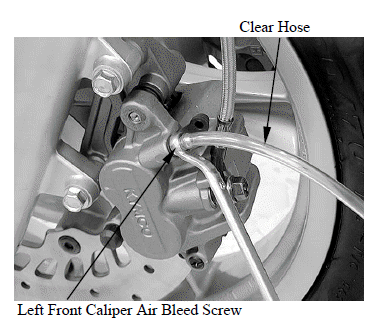
Connect a clear hose to the left front caliper air bleed screw and insert the other end of the hose into a receptacle.
Loosen the air bleed screw and pump the brake lever until the old brake fluid is completely out of the brake system.
Close the air bleed screw and disconnect the clear hose. Fill the reservoir with new brake fluid to the upper end of the inspection window.
Tighten the bleed screw to the specified torque.
Torque: 6 N*m (0.6 kgf*m, 4.3 lbf*ft)
Combination brake
Avoid spilling brake fluid on painted, plastic or rubber parts and so on. Place a rag over these parts whenever the system is serviced.
Place the scooter on a level surface and keep the handlebar straight.
Remove the master cylinder reservoir cap and diaphragm.
Suck up the old brake fluid as much as possible.
Fill the reservoir with new brake fluid.
Specification and classification: DOT 4
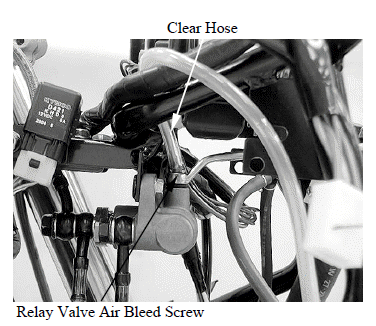
Step 1:
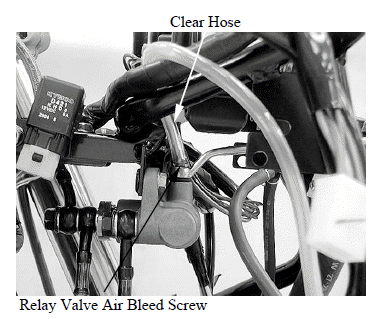
Connect a clear hose to the delay valve air bleed screw and insert the other end of the hose into a receptacle.
Loosen the air bleed screw and pump the brake lever until the old brake fluid is completely out of the brake system. Close the air bleed screw and disconnect the clear hose. Fill the reservoir with new brake fluid to the upper end of the inspection window.
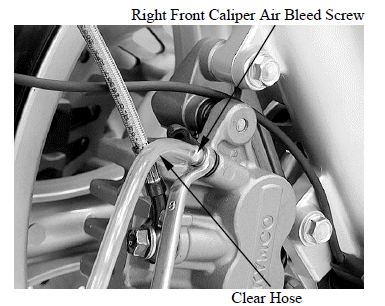
Step 2:
Connect a clear hose to the right front caliper air bleed screw. The right brake fluid replacement is the same way as that of the step 1.
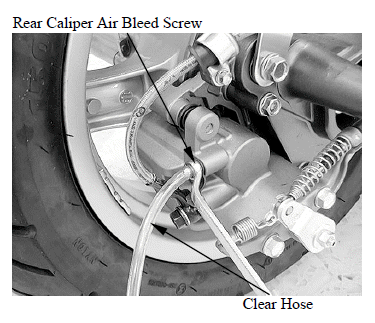
Step 3:
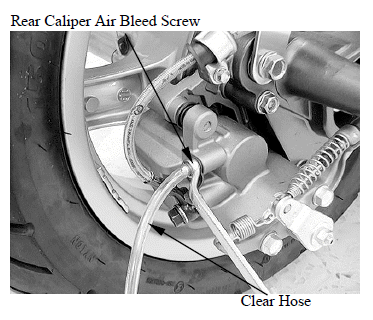
Connect a clear hose to the rear caliper air bleed screw. The rear brake fluid replacement is the same way as that of the step 1.
BLEEDING THE HYDRAULIC BRAKE SYSTEM
Bleed the brake fluid circuit:
- The system has been disassembled.
- A brake hose or brake pipe have been loosened or removed.
- The brake fluid has been very low.
- The brake operation has been faulty.
A loss of braking performance may occur if the brake system is not properly bled.
Air bleeding steps (Front brake):
1. Add the proper brake fluid to the reservoir.
2. Install the diaphragm. Be careful not to spill any fluid or allow the reservoir to overflow.
3. Connect the clear plastic hose tightly to the left front caliper air bleed screw.
4. Place the other end of the hose into a container.
5. Slowly apply the brake lever several times.
6. Pull the lever in and hold it.
7. Loosen the bleed screw and allow the lever to travel towards its limit.
8. Tighten the bleed screw when the lever limit has been reached, then release the lever.
9. Repeat steps (5) to (7) until all the air bubbles have disappeared from the fluid.
10. Tighten the bleed screw.
Torque: 6 N*m (0.6 kgf*m, 4.3 lbf*ft)
If bleeding is difficult, it may be necessary to let the brake fluid settle for a few hours.
Repeat the bleeding procedure when the tiny bubbles in the system have disappeared.
11. Add brake fluid to the proper level and install the master cylinder reservoir cap and diaphragm.
Check the operation of the brake after bleeding the brake system.
Air bleeding steps (combination brake):
The combination brake system air bleeding is the same manner as that of the front brake one.
Bleed the air from the rear side (rear caliper) and then the front side (right front caliper and delay valve).
Tighten the bleed screw.
Torque: 6 N*m (0.6 kgf*m, 4.3 lbf*ft)
If bleeding is difficult, it may be necessary to let the brake fluid settle for a few hours.
Repeat the bleeding procedure when the tiny bubbles in the system have disappeared.
Add brake fluid to the proper level.
Check the operation of the brake after bleeding the brake system.
Install the master cylinder reservoir cap and diaphragm.
See also:
 Kymco XCITING 500 - Service Manual > Schematic Drawing, Service Information
SCHEMATIC DRAWING SERVICE INFORMATION
Kymco XCITING 500 - Service Manual > Brake Pad
BRAKE PAD REPLACEMENT Front brake: Push the caliper pistons all the way in by pushing the caliper body inward to provide clearance for new pads.