 Kymco XCITING 500 - Service Manual > Crankcase Assembly
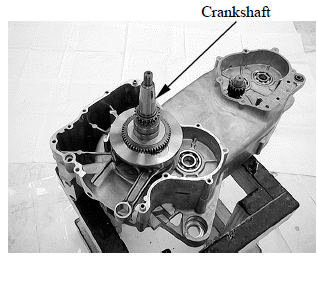
Install the crankshaft to the left crankcase.
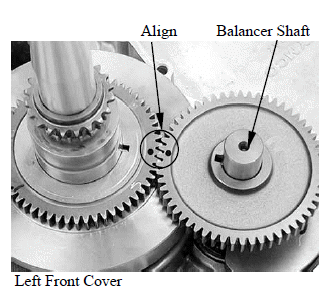
Install the balancer shaft to align the punch mark with the "O" mark on the crankshaft.
Install the washer onto the crankshaft.

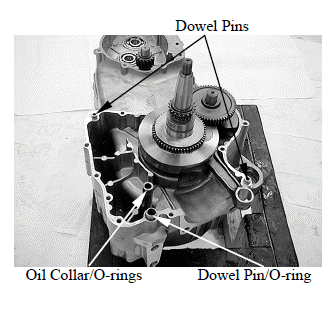
Install the oil collar and O-rings Clean the right and left crankcase mating surface thoroughly, being careful not to damage them.
Install the dowel pins and O-ring.
Apply a light but through coating of sealant (Threebond 1215 or equivalent) to all crankcase mating surfaces except the oil passage area.
Install the right crankcase over the left crankcase.
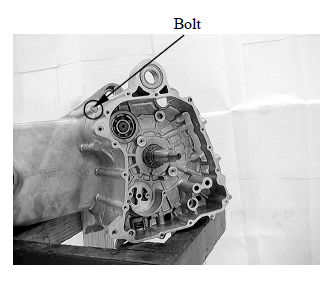
Install and turn in the right crankcase bolt but do not tighten it.
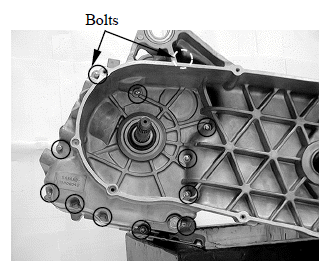
Install and tighten the left crankcase bolts in a crisscross pattern in 2 - 3 steps to the specified torque.
Torque: 12 N*m (1.2 kgf*m, 9 lbf*ft)
Tighten the right crankcase bolt to the specified torque.
Torque: 12 N*m (1.2 kgf*m, 9 lbf*ft)
Make sure that the crankshaft turns smoothly.
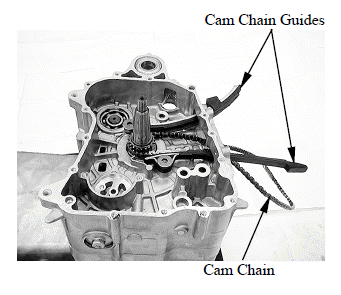
Install the cam chain guides to the right crankcase and tighten the bolts to the specified torque.
Torque: 20 N*m (2 kgf*m, 15 lbf*ft) Install the cam chain to right crankcase.
See also:
 Kymco XCITING 500 - Service Manual > Crankcase Separation
Remove the parts required for crankcase separation. Remove the twelve bolts from left crankcase. Loosen the bolts in a crisscross pattern in several steps.